The Ultimate Pickled Beets Guide: Uses, Brine & Storage Tips
There's something undeniably satisfying about a jar of vibrant, ruby-red pickled beets nestled in your pantry. More than just a humble root vegetable, when transformed through the magic of pickling, beets become a tangy, earthy-sweet condiment that elevates countless meals. Whether you're a seasoned canner with a bumper crop of fresh beets or a curious beginner looking to add a burst of flavor to your plate, this comprehensive guide will walk you through everything you need to know about making, using, and storing these delectable gems.
Why Embrace the Art of Pickled Beets?
The allure of homemade pickled beets extends far beyond their stunning color. For many, it's a cherished annual tradition, a way to savor the harvest long after the growing season has passed. If you find yourself with an abundance of fresh beets, pickling is an excellent method for preserving their unique flavor and nutritional benefits, ensuring you always have a taste of summer on hand.
*
Sustainability: Turn that "bumper crop" into pantry staples, reducing food waste and making the most of your garden's bounty.
*
Year-Round Enjoyment: Enjoy the bright, distinct flavor of beets even in the depths of winter, adding a cheerful splash of color to your meals.
*
Culinary Versatility: From simple side dishes to sophisticated charcuterie boards, pickled beets are incredibly adaptable, ready to enhance a variety of dishes with minimal effort.
*
Thoughtful Gifts: Jars of homemade pickled beets make fantastic, heartfelt food gifts that are always appreciated.
*
Pure Satisfaction: There's immense satisfaction in pulling a jar of your own preserved food from the pantry, knowing exactly what went into it.
Crafting Your Own Pickled Beets: A Step-by-Step Guide
Making pickled beets might seem daunting at first, but with a clear process, it's an incredibly rewarding kitchen project. We'll focus on the traditional water bath canning method here, which ensures your pickled beets are shelf-stable for long-term storage.
Essential Ingredients & Equipment
Before you begin, gather your essentials. The beauty of this recipe lies in its simplicity.
*
Fresh Beets: Choose firm, smooth beets with their greens still attached, if possible, as this indicates freshness.
*
For the Brine: White vinegar (or cider vinegar, rice wine vinegar), granulated sugar, pickling salt (never iodized table salt, which can cloud your brine), and reserved beet cooking water.
*
Spices: Whole cloves are traditional, but you can experiment with peppercorns, bay leaves, or a pinch of allspice.
*
Canning Jars: Wide-mouth canning jars (pint or quart-sized are common), lids, and bands.
*
Canning Tools: A large stockpot with a rack or trivet, a jar lifter, a canning funnel, and a non-metallic spatula.
Preparing Your Beets
The first step is to gently cook your beets until they are tender.
1.
Wash and Trim: Thoroughly wash the beets. Trim the greens, leaving about an inch of stem and the taproot intact to minimize "bleeding" of color during cooking.
2.
Boil Until Tender: Place the beets in a large pot and cover with water. Bring to a boil, then reduce heat and simmer until they are fork-tender. This usually takes about 15-30 minutes, depending on their size.
3.
Reserve Beet Water: This is a crucial step! Carefully scoop out 2 cups of the vibrant beet cooking water and set it aside. This water will form the base of your brine, contributing to both flavor and that iconic ruby color.
4.
Drain and Peel: Drain the remaining water. Once the beets are cool enough to handle, their skins should slip off easily. You can use your fingers or a paring knife. Trim off the remaining stem and root.
5.
Slice or Dice: Slice the peeled beets into uniform rounds, wedges, or dice them, depending on your preference.
The Flavorful Brine
The brine is where the magic happens, infusing your beets with their signature tangy-sweet profile.
1.
Combine Ingredients: In a large saucepan, combine the reserved beet water, vinegar, sugar, and pickling salt. Add any desired whole spices like cloves.
2.
Bring to a Boil: Heat the mixture, stirring occasionally, until the sugar and salt are fully dissolved and the brine comes to a rolling boil. Keep it hot.
You have some flexibility with vinegar choices. While white vinegar provides a classic crispness, cider vinegar offers a slightly fruitier, mellower note, and rice wine vinegar can add a subtle, delicate tang. Each will subtly alter the final flavor profile of your pickled beets.
Jarring & Processing for Shelf-Stability
This step is essential for creating shelf-stable pickled beets that will last for months.
1.
Sterilize Jars and Lids: While your beets are cooking and brine is simmering, sterilize your wide-mouth canning jars and lids. Submerge them in boiling water for at least 10 minutes. Keep them hot until ready to fill.
2.
Fill Jars: Carefully pack the hot, prepared beets into the sterilized hot jars, leaving about 1/2 inch of headspace from the rim. Add a few whole cloves to each jar for extra flavor, if desired.
3.
Pour Hot Brine: Ladle the hot brine over the beets, ensuring they are completely covered and maintaining 1/2 inch headspace. Use a non-metallic utensil to remove any air bubbles.
4.
Seal Jars: Wipe the jar rims clean, center a hot lid on each jar, and screw on the bands until fingertip tight.
5.
Water Bath Canning: Place a trivet or rack at the bottom of a large stockpot. Carefully place the filled jars onto the rack, ensuring they don't touch each other. Pour in enough boiling water to cover the jars by at least 1 inch. Bring the water in the stockpot back to a full boil, cover, and process for 10 minutes (adjusting for altitude if necessary).
6.
Cool and Store: After processing, turn off the heat, remove the lid, and let the jars rest in the hot water for 5 minutes. Carefully remove the jars with a jar lifter and place them on a clean towel on your counter, allowing them to cool undisturbed for 12-24 hours. You should hear the lids "pop" as they seal. Check for seals by pressing the center of each lid – it should not flex. For a detailed walkthrough of safe canning practices, you might find our article on
Easy Pickled Beets: Step-by-Step Canning for Year-Round Flavor incredibly helpful.
Refrigerator Pickled Beets: A Quicker Alternative
If you're not ready for full-scale canning or just want a small batch for immediate enjoyment, refrigerator pickled beets are a fantastic option. The main difference is that they are not processed in a water bath and, therefore, are not shelf-stable. They require refrigeration from the start.
To make them, you follow the same steps for cooking the beets, making the brine, and filling the jars. However, instead of water bath canning, you simply allow the filled jars to cool completely before storing them in the refrigerator. Refrigerator pickled beets are typically ready to eat within 24 hours and will last for about 3-4 weeks. For a deeper dive into the distinctions and safety considerations between these two methods, read our guide on
Pickled Beets: Canning vs. Refrigerator Methods & Safety.
Unleashing the Versatility of Pickled Beets
Once you have a jar of homemade pickled beets, the culinary possibilities are endless! Their vibrant color and tangy kick make them a standout ingredient.
*
Classic Side Dish: Serve them chilled straight from the jar alongside roasted meats, poultry, or fish.
*
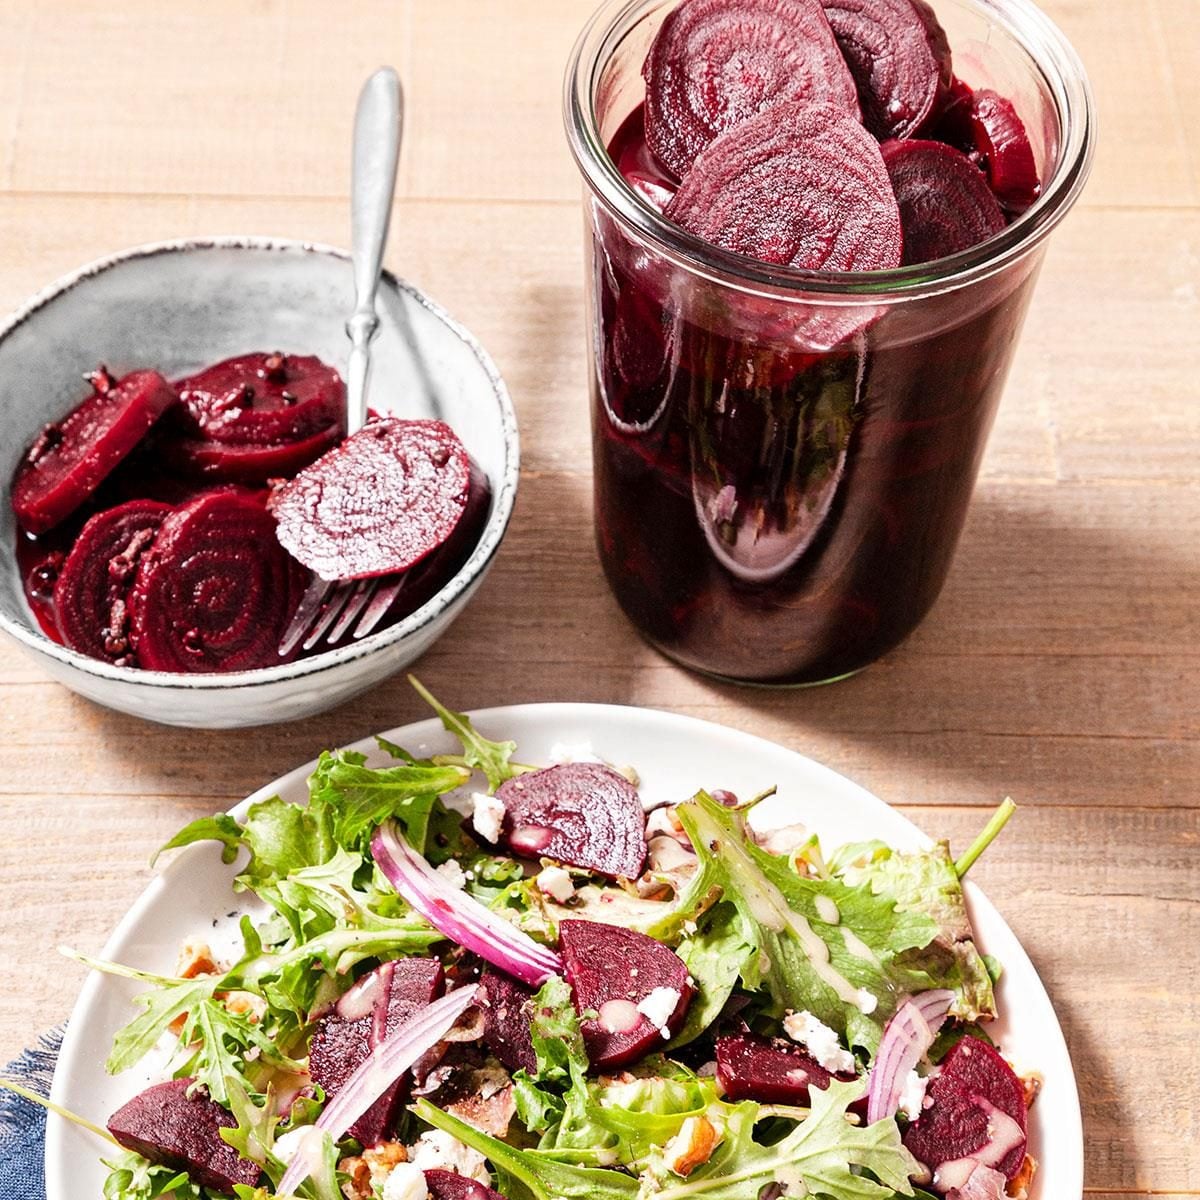
Salad Star: Dice them into green salads, potato salads, or grain bowls for an instant burst of flavor and color.
*
Sandwich & Burger Booster: Add slices to sandwiches, wraps, or burgers as a zesty condiment that cuts through richness.
*
Relish Tray Essential: A must-have on any relish tray or charcuterie board, pairing beautifully with cheeses, cured meats, and crackers.
*
Creative Appetizers: Pair them with crumbled goat cheese and fresh herbs on crostini, or chop them finely and mix into a beet hummus.
*
Savory Snacks: Enjoy them on their own as a healthy, satisfying snack.
*
Pickled Eggs: Don't discard that precious beet juice! It's the perfect liquid to make a batch of stunning pink pickled eggs. Simply add hard-boiled, peeled eggs to the leftover juice and refrigerate for a few days.
Storing Your Pickled Treasures
Proper storage is key to enjoying your homemade pickled beets safely for as long as possible.
*
Shelf-Stable Jars: Properly processed and sealed jars of pickled beets are shelf-stable. Store them in a cool, dark, dry place (like a pantry or cupboard) for up to 12 months. Avoid extreme temperature fluctuations or direct sunlight, which can compromise the quality and safety.
*
Opened Jars: Once a jar of pickled beets is opened, it must be stored in the refrigerator. Consume them within three to four days for the best quality and safety.
*
Refrigerator Batches: Any quick-pickled or refrigerator beets should always be stored in the refrigerator and consumed within 3-4 weeks.
Crafting your own pickled beets is a rewarding journey that connects you to the age-old tradition of food preservation. With their stunning color, tangy flavor, and incredible versatility, these homemade gems are sure to become a cherished staple in your kitchen. So, gather your fresh beets, prepare your brine, and get ready to enjoy the vibrant taste of homemade pickled beets all year round!